
























الدعم الفني


تم النشر 2026-07-07
عنوان SEO: كيفية توصيل SG90مضاعفات: دليل اتصال ذو 3 دبابيس للمبتدئين
الوصف التعريفي: تعلم SG90 الصحيحمضاعفاتالأسلاك، والدبابيس (GND، VCC، الإشارة)، وكيفية توصيلها بـ Arduino وRaspberry Pi. تجنب أخطاء القطبية العكسية الشائعة.
01SG90مضاعفاتالأسلاك: دليل كامل للاتصال ثلاثي الأطراف
إجابة سريعة
تتصل أجهزة SG90 عبر ثلاثة أسلاك:براون (GND) , أحمر (VCC، 4.8 فولت - 6 فولت)، وبرتقالي/أصفر (إشارة). يمكن أن تؤدي الأسلاك غير الصحيحة إلى إتلاف المؤازرة أو وحدة التحكم الخاصة بك على الفور. تحقق دائمًا من متطلبات الجهد الكهربي قبل التشغيل، ولا تقم مطلقًا بتوصيل السلك الأحمر مباشرةً بجهد 5 فولت من وحدة التحكم الدقيقة بدون مصدر طاقة منفصل لأجهزة متعددة. يغطي هذا الدليل تعريف الدبوس وأخطاء الأسلاك الشائعة والاتصال خطوة بخطوة لـ Arduino وRaspberry Pi.
مقدمة
لديك جهاز SG90 صغير في يدك، لكن ورقة البيانات مفقودة، والألوان لا تتطابق مع ما تتذكره. بني، أحمر، برتقالي، أم أسود، أحمر، أبيض؟ سلك واحد خاطئ ويحترق المؤازرة، أو ما هو أسوأ من ذلك، تتوقف لوحة التحكم الخاصة بك عن العمل.
هذه ليست حالة نادرة. يواجه العديد من الهواة والمهندسين نفس حالة عدم اليقين عند توصيل الأسلاك القياسيةسيرفو SG90لأول مرة. الإحباط حقيقي: تأخير في المشروع، واستبدال مكون، وساعة ضائعة في استكشاف الأخطاء وإصلاحها.
تبدو الأسلاك تافهة، لكنها المصدر الأكثر شيوعًا للفشل في المشاريع التي تعتمد على المؤازرة، بدءًا من الأذرع الآلية وحتى محاور الكاميرا. يمكن أن يتسبب عدم تطابق الجهد الكهربي أو القطبية المعكوسة أو تداخل الإشارة في حدوث حركة غير منتظمة أو عدم الاستجابة أو حدوث ضرر دائم.
يوجد هذا الدليل للقضاء على عدم اليقين هذا. سوف تتعلم بالضبط أي سلك يفعل ماذا، وكيفية توصيل SG90 بوحدات التحكم الدقيقة الشائعة، وما الذي يجب التحقق منه قبل توصيل الطاقة.
جدول المحتويات
1. فهم SG90 Servo Pinout
2. معايير ألوان الأسلاك والاختلافات
3. متطلبات الجهد والطاقة
4. كيفية توصيل SG90 بالاردوينو
5. كيفية توصيل SG90 بـ Raspberry Pi
6. أخطاء الأسلاك الشائعة وكيفية تجنبها
7. الأسئلة التي يطرحها المشترون غالبًا حول أسلاك SG90
8. اختيار السيرفو المناسب لمشروعك
فهم SG90 Servo Pinout
يستخدم SG90 واجهة قياسية بثلاثة أسلاك. وظيفة كل سلك ثابتة، ولكن يمكن أن تختلف رموز الألوان بين الشركات المصنعة.
السلك البني موجود دائمًاالأرض (GND). هذه هي النقطة المرجعية للدائرة بأكملها.
السلك الأحمر هوالطاقة (فك). يعمل SG90 في نطاق جهد يتراوح من 4.8 فولت إلى 6 فولت. عند جهد 5 فولت، يوفر أقصى عزم دوران يبلغ حوالي 1.8 كجم · سم. إذا قمت بتزويد جهد أقل من 4.8 فولت، فقد لا يتحرك السيرفو أو سيتوقف. إذا تجاوزت 6 فولت، فإنك تخاطر بإتلاف لوحة التحكم الداخلية.
السلك البرتقالي أو الأصفر هوإشارة. يستقبل هذا السلك أPWM (تعديل عرض النبضة)إشارة لقيادة موقف المؤازرة. يتراوح عرض النبض عادةً من 1 مللي ثانية (0 درجة) إلى 2 مللي ثانية (180 درجة)، ويتكرر كل 20 مللي ثانية.
لماذا يهم هذا:من الأخطاء الشائعة افتراض إمكانية توصيل السلك الأحمر مباشرة من طرف 5V الخاص بوحدة التحكم الدقيقة. بالنسبة لـ SG90 واحد، قد يعمل هذا مؤقتًا. بالنسبة لمخدمين أو أكثر، غالبًا ما يتجاوز السحب الحالي ما يمكن أن توفره اللوحة، مما يتسبب في إعادة التعيين أو التلف.
معايير ألوان الأسلاك والاختلافات
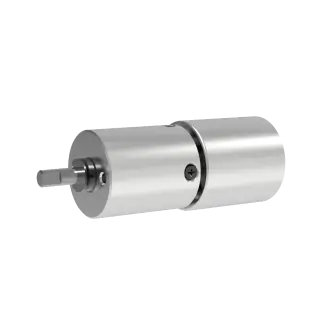
بينما يستخدم SG90 القياسي البني والأحمر والبرتقالي، فقد تواجه أنظمة ألوان أخرى.
تأكد دائمًا باستخدام مقياس متعددإذا كانت الألوان غير مألوفة. قم بقياس المقاومة بين GND المشتبه به والعمود المعدني للمؤازرة. إذا كانت الاستمرارية موجودة، فهذا السلك مؤرض.
إذا كنت تقوم بشراء أجهزة من دفعات مختلفة، فاختبر وحدة واحدة قبل توصيل توصيلات المشروع بأكمله. يمكن أن يؤدي اتصال الطاقة المعكوس إلى تدمير وحدة التحكم المؤازرة بالمللي ثانية.
متطلبات الجهد والطاقة
لم يتم تصميم SG90 لتطبيقات الجهد العالي أو التيار العالي. إن فهم حدود الطاقة الخاصة به يمنع حدوث حالات فشل غير متوقعة.
جهد التشغيل:4.8 فولت إلى 6 فولت
المماطلة الحالية (عند 5 فولت):حوالي 700 مللي أمبير إلى 800 مللي أمبير
الخمول الحالي:حوالي 10 مللي أمبير
مصدر الطاقة الموصى به:منظم 5 فولت منفصل أو حزمة بطارية لأجهزة متعددة
ماذا يحدث إذا تجاهلت هذا: When the servo stalls (for example, if a robotic arm hits an obstacle), current spikes to near-stall levels. If your controller cannot supply that current, voltage drops, and the microcontroller resets. This is often misdiagnosed as a software bug.
Our recommendation: For projects using two or more SG90 servos , use an external 5V power supply rated at least 2A. Connect the servo power wires directly to the supply, and only connect the signal wires to the microcontroller.
How to Connect SG90 to Arduino
Connecting the SG90 to an Arduino is straightforward, but the order of connection matters for safety.
1. التعرف على الأسلاك – Brown (GND), Red (VCC), Orange (Signal).
2. Connect GND – Brown wire to any GND pin on the Arduino.
3. Connect VCC – Red wire to 5V pin on the Arduino (only for a single servo and light load).
4. Connect Signal – Orange wire to a PWM-capable digital pin, eg, pin 9.
For multiple servos: Do not connect the red wires to the Arduino 5V pin. Use an external power supply. Connect all brown wires to a common ground shared with the Arduino.
Sample code logic: The servo library uses servo.attach(9)ومضاعفات الكتابة(90) to set position. Pulse timing is handled automatically.
تحذير: If the servo jitters or moves erratically, check your power supply first. In most cases, it is not a coding issue but insufficient current.
How to Connect SG90 to Raspberry Pi
The Raspberry Pi operates at 3.3V logic, while the SG90 expects a 5V signal. Direct connection can cause unreliable behavior.
Correct wiring for Raspberry Pi:
1. أرض – Brown wire to any GND pin on the Pi.
2. VCC – Red wire to a 5V pin on the Pi (only for a single servo).
3. إشارة – Orange wire to a GPIO pin, eg, GPIO 18 (PWM0).
مهم: The 3.3V logic high from the Pi may not reliably trigger the servo's signal detection. A شيفتر المستوى is recommended for consistent performance. Without it, the servo may not reach full rotation or may stop mid-movement.
Power caution: The Raspberry Pi's 5V rail is limited. Drawing 700mA from a single servo can cause voltage dips that affect the Pi's stability. Use an external power supply for the servo and connect the grounds.
Software note:استخدمخنزير library for hardware-based PWM. The default RPi.GPIO software PWM often produces jitter.
أخطاء الأسلاك الشائعة وكيفية تجنبها
These mistakes are frequent and easily preventable.
1. Reverse polarity. Connecting the red wire to GND and brown to VCC destroys the servo's control board immediately. Always double-check before connecting power.
2. Insufficient power. Using a single servo with a microcontroller's 5V pin is borderline. Adding a second servo often causes failures. Use an external regulator.
3. Signal wire on non-PWM pin. On Arduino, only pins marked with ~ support PWM. Using a digital-only pin will not produce movement.
4. Ground not shared. When using an external power supply, if the servo's ground is not connected to the microcontroller's ground, the signal has no return path. The servo will not respond.
5. Over-torque and stall. If the servo cannot complete its commanded motion, it draws stall current. This heats the motor and can damage the internal potentiometer.
What to check before powering on:
[ ] Wire colors verified with multimeter
[ ] Power supply voltage measured (4.8V–6V)
[ ] GND shared between servo and controller
[ ] Signal pin configured for PWM output
[ ] Load does not exceed servo torque rating
Questions Buyers Often Ask About SG90 Wiring
Q: Can I use an SG90 servo with a 3.3V microcontroller?
Yes, but you should use a level shifter for the signal line. The servo's power must still be 5V. The signal from 3.3V logic may not reliably trigger the servo.
Q: What happens if I connect the SG90 to 12V?
The servo will be damaged almost immediately. The internal components are rated for a maximum of 6V. 12V will burn the control board.
Q: Can I control an SG90 without a PWM library?
It is possible by manually generating pulses in your code, but it is not recommended. Timing errors cause jitter and inconsistent position. Using a library is more reliable.
Q: How do I know if my SG90 is broken?
If the servo does not move but you feel resistance when turning the shaft manually, the internal gears may be stripped. If there is no resistance and it spins freely, the gear train is broken.
Q: Does the SG90 need a capacitor on the power line?
Adding a 100µF to 470µF electrolytic capacitor across the power and ground near the servo can reduce voltage spikes and improve stability, especially during rapid movements.
Q: Can I use the SG90 for continuous rotation?
The standard SG90 is not designed for continuous rotation. You can modify it by removing the mechanical stop, but position feedback will be lost. For continuous rotation, use a dedicated continuous rotation servo.
Q: Why does my SG90 only move a few degrees?
This usually indicates a signal issue. Check that the PWM frequency is 50Hz and the pulse width range is correct. Also verify that the power supply can deliver enough current.
Q: Can I daisy-chain multiple SG90 servos?
You can share the power and ground wires, but each servo needs its own signal wire connected to a separate PWM pin. Do not connect signal wires together.
Choosing the Right Servo for Your Project
The SG90 is suitable for lightweight applications: small robot arms, camera pan/tilt mechanisms, and model aircraft control surfaces. It is not designed for high-torque or continuous-duty industrial use.
When the SG90 is the right choice:
Your project requires a compact, low-cost servo
The load is light (under 200g)
The movement is intermittent, not continuous
You have a stable 5V power supply
When to look for alternatives:
You need higher torque or metal gears
The servo will run for extended periods
Your application requires precise feedback (use a feedback servo or encoder)
You are working in an industrial environment with higher voltage requirements
For buyers comparing options: Evaluate the متطلبات عزم الدوران of your application first. If the SG90 cannot lift the load at the required speed, no amount of wiring improvements will fix it. Upgrade to a metal-gear servo like the MG90S for heavier loads.
If you are unsure about your specific application, send your project specifications to an engineering team for review. A five-minute review can prevent weeks of troubleshooting.
Need Help Selecting the Right Servo?
Wiring the SG90 correctly is the first step. The next is ensuring the servo itself matches your application's torque, speed, and durability needs.
فيkpowerمضاعفات , we specialize in servo solutions for both prototyping and production. Whether you need standard micro servos or custom servo solutions for industrial motion control applications, our engineers can help match the right product to your load and power requirements.
Request a quoteأوupload your project specifications for an engineering review. We can help you verify torque, voltage compatibility, and wiring integration before you order.
Update Time:2026-07-07


