


TECHNICAL SUPPORT


Published 2026-03-27
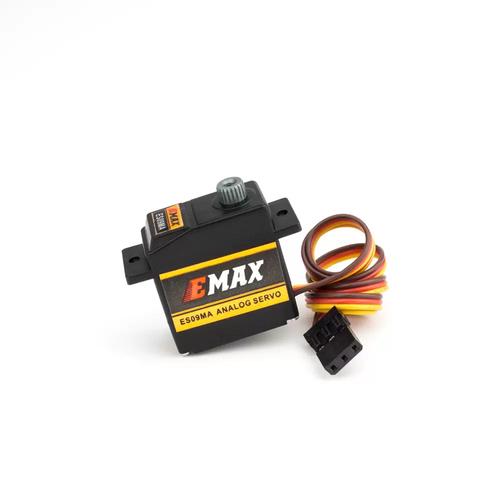
Have you ever encountered this situation: you excitedly bought a few tiny pro microservos, only to find that there was no place for this little guy in the project? I didn’t have a suitable bracket on hand, and I didn’t want it to be too crude to stick directly to the device. Don't worry, today we will talk about how to find a stable "home" for this smallservo, so that your creative products not only have online performance, but also have full appearance and stability.
Many friends think that theservocomes with built-in ears. Isn’t it just a matter of tightening two screws? However, micro servos such as tiny pro micro servo have small torque but high vibration frequency. If it is directly fixed on a plastic plate or wooden board, over time, the screw holes will easily slip and the position of the servo will shift, which will affect the transmission accuracy at least, or cause the entire mechanism to get stuck. The special shell is like putting on a tailor-made armor, limiting vibration and displacement within the shell, protecting the servo while also ensuring the stability of the output end.
Moreover, a well-designed case can also solve the problems of heat dissipation and wiring. Even though the servo is small, it will also generate heat during continuous operation. The heat cannot be dissipated in a closed environment, and the life of the internal circuit and motor will be reduced. Special casings usually have heat dissipation holes and cable management slots reserved to allow wires to run in an orderly manner without interfering with moving parts. It also makes the inside of your device look clean and neat, instantly improving the product feel.
When choosing a shell material, you must first consider your usage scenario. If it is in a lightweight, low-load environment such as a desktop robot or model aircraft, high-strength nylon or injection molded parts are sufficient. They are light in weight, have good insulation, and are affordable. You can easily make them with your own 3D printer, and are especially suitable for prototype verification and small batch production. The nylon material also has a certain degree of toughness, which can absorb slight impacts when the steering gear is working and protect the gears.
If your project involves outdoor work or the load is slightly larger, then you should consider aluminum alloy materials. The aluminum alloy shell not only conducts heat quickly and can quickly dissipate the heat inside the servo, but also has high structural strength. Even if it is repeatedly disassembled and assembled, the screw holes will not slip easily. ️ A little tip: When choosing an aluminum alloy shell, remember to look at the surface treatment process. The anodized surface is wear-resistant, anti-corrosion, and has a higher quality texture, making your products more convincing in front of customers.
After you get the casing, don't rush to put the servo in it yet. The first step is to check whether the drawing of the shell matches your servo model. Although the tiny pro micro servo is called "pro micro", the dimensions of different manufacturers may differ by one or two millimeters. It is best to first use a caliper to measure the length, width and height of the servo body, and then compare it with the internal dimensions of the housing to ensure it fits perfectly. ️ If you are careless at this step, your work may be in vain later.
The second step is to secure the servo. Usually the shell is designed with an upper and lower cover structure, or a side pull-out type. Align the servo to the installation slot and push it in gently. Note that the direction of the output shaft should be aligned with the shaft hole reserved in the housing. Then fix it from the designated position with the supplied screws. Remember not to tighten it all at once. Take all the screws first, and then tighten them diagonally step by step. This can avoid shell deformation or uneven force on the servo. Finally, you can apply a little grease between the output shaft and the housing hole to reduce friction and make the servo rotate more smoothly.
There is a pitfall that many people have stepped on: screws with the wrong specifications. The mounting holes of the tiny pro micro servo are usually adapted to M2 or M2.5 screws. If too long screws are used, they may hit the circuit board inside the servo, causing a short circuit or the servo housing to break. ️ It is recommended that when buying a casing, ask the merchant to directly match the special screws, or prepare a set of M2 stainless steel screws yourself. The length should be controlled between 4-6 mm for the best safety.
Another common problem is improper handling of the outlet. The outlet of some shells is relatively small. Forcibly threading the cable may scratch the servo cable, causing a potential short circuit. The correct approach is to use a round file to slightly smooth the edge of the outlet before threading, or use heat shrink tubing to cover the point where the wire contacts the housing with a layer of protection. If your project requires waterproofing and dustproofing, you must choose a housing with waterproof connectors and use it with a sealing rubber ring to allow the equipment to operate stably in harsh environments.
The first case: intelligent flower watering system. A maker friend used a tiny pro micro servo to make an automatic flower watering machine. The servo controls the opening and closing of the water valve. He equipped the servo with a transparent acrylic shell, which is not only resistant to splashing water, but also allows you to directly see the operating status of the servo, which is particularly intuitive when showing it to customers. The bottom of the casing is designed with standard Lego holes, allowing him to easily fix the servo module on the bracket of the flower watering machine. Only four screws are needed for subsequent maintenance and disassembly.
The second case: desktop photography turntable. Another friend who does product photography needs a small rotating stage to shoot still life. He uses a tiny pro micro servo with a custom-made aluminum alloy housing. The top of the housing directly integrates the turntable bearing interface, and the bottom has a 1/4-inch camera screw hole. In this way, the servo becomes a professional electric turntable, which can accurately control the rotation angle when shooting. It no longer has to be pushed by hand like before, and the film yield has been greatly improved. This approach of using the shell as a functional integration platform is worth learning from.
If you want to equip your project with a suitable casing now, the most direct way is to search for a company that specializes in micro transmission accessories. Open your browser and enter the keywords "tiny servo housing" or "tiny servo mount" and you will find many suppliers specializing in this field. ️ Here’s a little suggestion: Prioritize looking for businesses that not only sell casings, but also provide 3D model downloads and technical drawings. This can save you a lot of design and verification time, and you can use it directly.
Also, don’t forget to check out the company’s official website. A professional housing supplier will usually list in detail each housing material, applicable servo model, mounting hole location map and application cases on its official website. Browsing this information will not only help you quickly determine whether the product is suitable for you, but also get a lot of design inspiration from it. If you see a certain case that particularly appeals to your taste, you may wish to contact customer service directly and ask if you can apply for a sample to test.
When you were making the casing for the servo, did you encounter any particularly troublesome installation problems? Or have you designed some clever structures yourself? Welcome to share your experience in the comment area so that more friends can avoid detours. If you think this article is useful to you, remember to give it a like and share it with your friends who are tinkering with servos!
Update Time:2026-03-27
Contact Kpower's product specialist to recommend suitable motor or gearbox for your product.


