


TECHNICAL SUPPORT


Published 2026-04-29
Use an Arduino development board to control the rotation angle of the servo with the help of a button. This is one of the most practical basic functions in electronic production. This article directly gives a complete solution. Use an ordinary button. When pressed, the servo rotates to 90 degrees, and when released, it returns to 0 degrees. You only need an Arduino development board, a 9g servo, a button, a few Dupont wires and a breadboard. According to the wiring diagram and code below, it can be completed in 30 minutes.
Required hardware list:
Arduino development board (any model is acceptable, this article takes the most common model as an example)
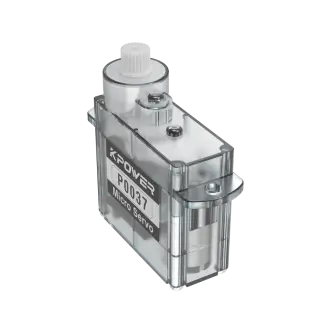
SG90 9g servo (low power servo, suitable for entry-level)
Touch button (6x6x5mm four-pin)
10kΩ resistor (for pull-down resistor)
Breadboard and some Dupont wire
Wiring steps (must be precise):
1. Connect the servo signal line (usually orange or yellow) to pin 9 of Arduino
2. Connect the servo power cable (red) to the 5V pin
3. Connect the servo ground wire (brown or black) to the GND pin
4. One pin of the button is connected to 5V, and the other pin is connected to pin 2.
5. Connect a ten kΩ pull-down resistor in parallel between pin 2 and GND to ensure that the input is LOW when not pressed.
A common mistake is that omitting the pull-down resistor will cause the button state to jump erratically. One end of the resistor is connected to pin 2, and the other end is connected to GND.
#includeservomyservo; //Create servo object int buttonPin = 2; //Button connection pin int buttonState = 0; //Storage button state intservoPos = 0; // Current servo angle void setup() { myServo.attach(9); // Connect the servo signal line to pin 9 pinMode(buttonPin, INPUT); // Set the button pin as input myServo.write(0); // Initialize the servo angle to 0 degrees } void loop() { buttonState = digitalRead(buttonPin); // Read the button state if (buttonState == HIGH) { // When pressed myServo.write(90); // The servo turns to 90 degrees delay(15); // Wait for the servo to reach the position } else { // When not pressed myServo.write(0); // The servo returns to 0 degrees delay(15); } } The core code logic is to use digitalRead() to continuously detect the level of pin 2。Once the button is pressed, that is, when the pin is in the HIGH state, the servo performs the write(90) operation.。When the button is released, the servo returns to write(0) operation.. Through structured writing, we divide the program into four clearly organized modules: initialization, reading, judgment and execution, so that you can expand it into a multi-key or multi-angle control mode in the subsequent stages.
Q: The servo doesn’t move at all. What could be the reason?
Insufficient power source. The servo must be powered separately. The 9g servo can directly use the 5V of Arduino, and the larger servo must be powered by an external power supply.
Q: Press the button once and the servo will rotate once. Will it return to zero when released?
A: There is a logic error in the code. Make sure you use the if-else structure provided above, instead of just determining the conditions after pressing.
Q: What should I do if the steering gear shakes or the steering is incorrect?
1. Check whether the signal line is loose. 2. Add delay(15) after write(). 3. This will provide sufficient action time for the servo.
Q: How to change it to turn 90 degrees by pressing once and return to zero by pressing again?
Variables need to be added to record the status. Whenever it is detected that the button is pressed, the flag bit is changed and the corresponding angle is written.
Q: The buttons are slow to respond and sometimes no response occurs?
Due to the mechanical jitter of the keys, you can add delay(10) after detecting the level change to eliminate the jitter, or use the Bounce2 library。
After mastering basic single-button control, you can easily implement the following advanced functions:
1. Two buttons control forward and reverse respectively.
Button A: Press to go to 180 degrees, release to go back to 0 degrees
Button B: Press to go to 45 degrees, release to go back to 0 degrees
Modify the code: add a second button pin and judge separately
2. Single button to cycle through three angles
// The angle is accumulated each time it is pressed, 0→60→120→0 loop int angles[] = {0, 60, 120}; int index = 0; if (buttonState == HIGH && !flag) { // Anti-double click index = (index+1) % 3; myServo.write(angles[index]); flag = true; }3. Long press to rotate continuously
Detect the button duration and continue to increase the angle after it exceeds 500ms until released.
The following are complete code examples with extended functions. The principles are all based on the structured writing logic of this article, that is, clear input. This input consists of key states, followed by processing, which is angle calculation, and finally output, which is used as a servo command.
Emphasis on the core point: The essence of Arduino button control of the servo is the transformation of "digital signals to PWM signals". The buttons give high and low levels, and the servo rotates to the preset angle according to the level value.As long as the wiring is correct (the pull-down resistor must not be omitted) and the code logic uses if-else or state machine, stable control can be achieved.。
Here are three action suggestions you can take immediately:
1. Tonight, I will build a basic version: based on the wiring diagram and code in this article, use the breadboard to build a complete circuit, and personally witness the scene of the servo rotating when the button is pressed.
2. Exploring the experiment by changing the angle value: change the state of 90 degrees into random numerical forms such as 45 degrees, 135 degrees, 180 degrees, etc., carefully pay attention to the changes in the steering position caused by the observation, and then understand that the parameter range of the write() function is from zero to 180 degrees.
3. Add a second button and rely on the current code to copy the button reading module to achieve a product prototype with real interactive characteristics that can be controlled by different buttons at different angles.
You already have all the key knowledge to achieve button-controlled servos from scratch. Now please open the Arduino IDE, connect the hardware, and verify each step yourself.
Update Time:2026-04-29
Contact Kpower's product specialist to recommend suitable motor or gearbox for your product.


