



























TECHNICAL SUPPORT


Published 2026-07-06
01Quick Answer
To set up a microservowith Arduino, connect theservosignal wire to a PWM-capable digital pin (usually pin 9), power wire to 5V, and ground to GND. Upload a simple sweep or position-control sketch using theservo.h library. This setup allows precise angular control from 0 to 180 degrees, ideal for robotics, automation prototypes, and motion control applications. However, power limitations and torque requirements must be considered, especially when using multiple servos or continuous rotation.
02Introduction
You have a project that needs precise motion, but the mechanism jams, the angle drifts, or the servo simply does not respond. This is a common frustration when integrating aMicro Servowith Arduino for the first time. The problem is rarely the hardware. More often, it is a wiring error, insufficient power, incorrect library usage, or a misunderstanding of PWM signal timing. For engineers, hobbyists, and prototyping teams, every hour spent debugging a basic servo setup is time lost on the actual application — whether that is a robotic arm, a pan-tilt camera mount, or an automated valve. This guide walks through the exact steps to get aMicro Servorunning reliably, and what to check when it does not.
03Table of Contents
1. What You Need Before Starting
2. Wiring aMicro Servoto Arduino
3. Understanding the Servo Control Signal
4. Writing and Uploading the Basic Control Code
5. Common Problems and How to Fix Them
6. Power Considerations and Risks
7. Choosing the Right Micro Servo for Your Project
8. Key Specifications to Compare
9. Questions Buyers Often Ask About Servo Setup
10. Making Your First Motion Control Project Work
04What You Need Before Starting
Before writing any code, confirm you have these components:
An Arduino board (Uno, Nano, Mega, or compatible)
Amicro servo(typically SG90, MG90S, or similar 5V type)
Jumper wires (female-to-male for breadboard connection)
A breadboard or direct connection
A stable 5V power source (USB alone may not be sufficient)
Many beginners assume the Arduino's 5V pin can power any servo. That is not always safe. A typical micro servo draws 200–500 mA under load, and peaks can exceed 1 A. The Arduino's onboard regulator is not designed for sustained current above 500 mA. If your servo stalls or resets the board, power is the first variable to check.
05Wiring a Micro Servo to Arduino
Most micro servos use a standard three-wire interface:
Brown or black wire: Ground (GND)

Red wire: Power (5V)
Orange or yellow wire: Signal (PWM pin)
Connect as follows:
Use a separate external 5V power supply if running more than one servo or if the servo is under continuous load. In that case, connect the servo power and ground directly to the external supply, and only share the ground line with the Arduino. This prevents voltage drops that cause erratic behavior.
06Understanding the Servo Control Signal
Amicro servois controlled by a pulse-width modulation (PWM) signal. The servo expects a pulse every 20 milliseconds (50 Hz). The pulse width determines the position:
1 ms pulse → 0 degrees
1.5 ms pulse → 90 degrees (center)
2 ms pulse → 180 degrees
The Arduino Servo.h library handles these timings automatically. You do not need to generate PWM manually unless you are working with a continuous rotation servo or a non-standard model. However, understanding this signal helps when troubleshooting. If the servo twitches or only moves partway, the pulse width range may differ from the standard 1–2 ms. Some servos require 0.5–2.5 ms for full range.
07Writing and Uploading the Basic Control Code
Below is a minimal sketch to test a micro servo. It sweeps from 0 to 180 degrees and back.
#includeServo myServo; int pos = 0; void setup() { myServo.attach(9); // Signal pin } void loop() { for (pos = 0; pos = 0; pos -= 1) { myServo.write(pos); delay(15); } } Upload this to your Arduino. The servo should sweep smoothly. If it does not, check the following in order:
1. Power supply voltage (measure at the servo's red wire)
2. Wiring polarity (reversed power damages servos)
3. Pin number in theattach()function matches the wiring
4. Library is correctly included (Servo.h is pre-installed)
For precise position control, replace the sweep loop withmyServo.write(90);to set a fixed angle. UsemyServo.writeMicroseconds(1500);for microsecond-level timing control.
08Common Problems and How to Fix Them
Even with correct wiring, servos can behave unpredictably. The most frequent issues are:
Servo jitters or vibrates: Often caused by unstable power or electrical noise from the motor. Add a 100 µF to 470 µF electrolytic capacitor between 5V and GND near the servo.
Servo does not move: Check if the signal wire is connected to a PWM-capable pin. On Arduino Uno, pins 3, 5, 6, 9, 10, and 11 support PWM. Pin 13 does not.
Servo moves only part of the range: The pulse width range may be non-standard. UsemyServo.attach(9, 500, 2500);to set custom min and max pulse widths.
Arduino resets when servo moves: The servo draws more current than the USB port can supply. Use an external 5V power supply with at least 1 A capacity.
Servo gets hot: Continuous stalling or over-voltage. Verify the servo is rated for 5V, and reduce mechanical load if it is fighting against a bound joint.
09Power Considerations and Risks
Power is the most underestimated factor inservo motorprojects. A single micro servo under stall load can draw 700–1000 mA. If you are running two or three servos, total current can exceed 2 A. The Arduino's 5V pin, powered via USB, typically provides only 500 mA.
Safe power strategy :
For 1 servo with light load: Arduino 5V pin is acceptable for testing
For 2+ servos or continuous operation: Use a separate 5V 2A+ power supply
Always common the grounds between the Arduino and external supply
Add a capacitor (100–470 µF) across the servo power lines to smooth current spikes
Ignoring power can damage the Arduino's voltage regulator, cause data corruption, or stall the servo at a critical moment in your application.
10Choosing the Right Micro Servo for Your Project
Not all micro servos are the same. Selection depends on torque, speed, voltage, and gear material.
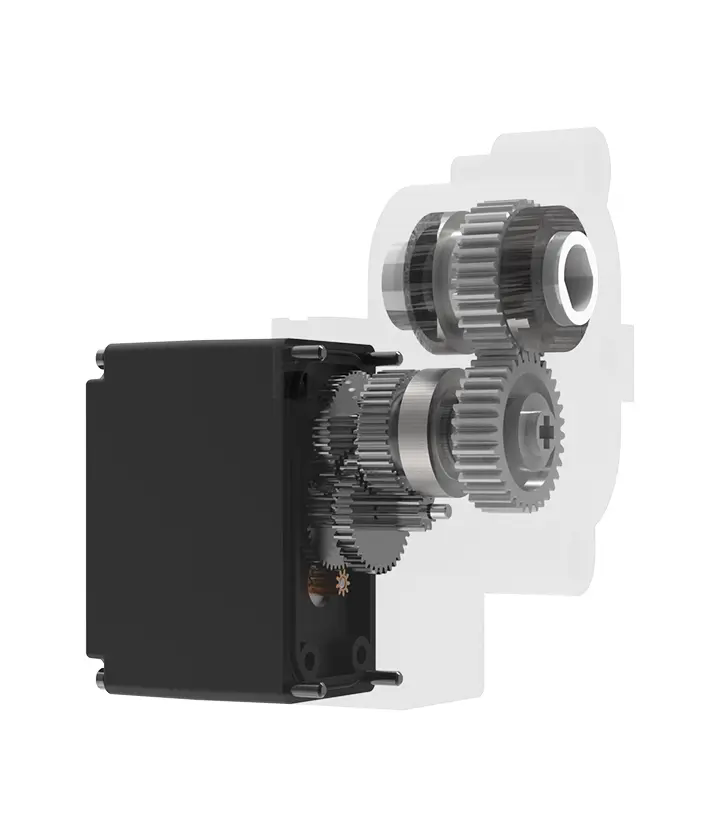
Plastic gear servos(eg, SG90): Lightweight and low cost, suitable for low-torque applications like small pan-tilt mounts or lightweight robotics. They strip easily under shock load.
Metal gear servos(eg, MG90S): Heavier but far more durable. Suitable for applications where the servo may be subjected to vibration or external force, such as robotic arms or walking robots.
Continuous rotation servos: Modified to spin freely in both directions. Useful for wheels or conveyor belts. They cannot hold a fixed position. Control uses speed instead of angle.
For most beginners, a standard 9g micro servo (SG90 or equivalent) is sufficient for learning and prototyping. For production or long-term use, considercustom servo solutionswith reinforced gears or higher stall torque.
11Key Specifications to Compare
When evaluating micro servos, compare the following parameters:
Use this table when comparing servos from different suppliers. A cheaper servo with lower torque may cause project delays if it fails under load. A more expensivemetal gear servomay save replacement costs over time.
12Questions Buyers Often Ask About Servo Setup
1. Can I power a micro servo directly from the Arduino 5V pin?
For one servo during brief testing, yes. For continuous operation or multiple servos, use an external 5V supply. The Arduino regulator cannot sustain high current.
2. Why does my servo only move 90 degrees instead of 180?
Some servos have a limited rotation range. Check the datasheet. Alternatively, the pulse width range may require adjustment usingmyServo.attach(pin, min, max) .
3. What happens if I connect the servo to 3.3V?
The servo may not move or may move slowly. Most micro servos require at least 4.5V to operate reliably. Using 3.3V can cause stalling and overheating.
4. Can I control multiple servos with Arduino?
Yes. Each servo needs a separate PWM pin. Use multipleServoobjects in code. Ensure total current draw does not exceed your power supply capacity.
5. How do I make a servo hold its position without power?
Standard servos cannot hold position without power. For holding a load, use a servo with a metal gear set and a mechanical lock, or add a separate braking mechanism.
6. What is the difference between analog and digital servos?
Analog servos use a simpler control loop and are less responsive. Digital servos use a higher frequency control signal, providing faster response and stronger holding torque, but draw more current.
7. Can I use a micro servo for continuous rotation?
Standard micro servos are position-only. For continuous rotation, you need a modified servo or a specifically designed continuous rotation servo. Modifying a standard servo requires internal hardware changes.
8. Why does my servo twitch when connected to Arduino?
This is usually caused by power fluctuations. Add a capacitor across the power lines. If the twitching persists, check for loose wiring or a faulty servo.
9. What is the maximum cable length for a micro servo?
Keep servo cables under 30–50 cm for reliable signal transmission. Longer cables can introduce noise and voltage drop. Use shielded cables if longer runs are unavoidable.
10. Do I need a servo driver board for basic projects?
No. The Arduino Servo library handles PWM generation. A driver board is only needed for high-power servos or when precise timing is required for multiple servos simultaneously.
13Making Your First Motion Control Project Work
Setting up amicro servowith Arduino is a straightforward task when you follow the correct wiring, power, and code sequence. The most common failures are not hardware defects — they are power underestimation, wrong pin assignment, or assuming all servos use the same pulse range.
To move from testing to a real application:
Start with a single servo on external power
Verify full range of motion mechanically before adding code logic
Add capacitors to stabilize power
Test under expected load before final assembly
Use a multimeter to confirm voltage at the servo terminals
If you are sourcing servos for a production prototype, request a sample from your supplier and test it under your actual load conditions. Document the pulse width range, stall current, and operating temperature. These measurements will guide your design decisions and prevent field failures.
For teams evaluatingmotion control applicationsor scaling up from prototype to production, working with a supplier who provides detailed technical documentation and consistent servo performance is critical. Do not rely on generic specifications from marketplace listings. Request the actual test data for the batch you are buying.
When you are ready to move forward, send your project specifications — including torque requirements, operating voltage, and expected cycle life — to your engineering contact. A technical review of your servo selection can save weeks of rework and avoid costly field replacements.
Update Time:2026-07-06

Contact Kpower's product specialist to recommend suitable motor or gearbox for your product.


