


TECHNICAL SUPPORT


Published 2026-03-24
When doing product innovation or DIY projects, do you often encounter this situation: the miniatureservoyou bought either has a false torque limit and cannot turn, or it gets stuck after a few uses. What’s even more annoying is that the control accuracy is ridiculously poor, making the robot arm you worked so hard to make look like a Parkinson’s patient. Don’t worry, today we will talk about microservo, a reliable choice, and see how it can help you avoid these pitfalls.
There are as many micro servos on the market as snacks in supermarkets, with prices ranging from a few yuan to dozens of yuan, but the parameters of many cheap products are "written to look good." You may ask, how to judge whether it is reliable? As a brand deeply involved in the field of servos, its micro servo series parameters are all real, such as the nominal torque of 2.5kg/cm, which means it can really reach this value at 4.8V voltage. I have seen too many friends buy cheap products from off-brand products, only to have their servo crash at a critical moment in the robot competition, which is like crying without tears.
Another important reason for choosing micro servo is durability. You can think of it like a tool. A cheap screwdriver from the hardware store will wear out after a few uses, but a brand-name tool will last for years. The steering gear uses metal gears or high-strength nylon gears internally, and the motor is also a customized long-life model. If you are working on a project that requires frequent movements, such as a robotic arm grabbing hundreds of times a day, or a robot dog running for several hours, this kind of reliability can save you countless hours of debugging and replacement.
We must first translate the "heavenly book" on the parameter table into human language. The simplest value of torque is the "how strong" the steering gear is. The unit is usually kg/cm, which means how many kilograms of weight can be lifted on a 1 cm long rocker arm. For small robot joints, 1.5 to 3kg/cm is generally sufficient. The unit of speed is seconds/60 degrees. The smaller the number, the faster it turns. For example, 0.1 seconds/60 degrees is a high-speed model. The working voltage is also critical, usually between 4.8V and 6V. If you use a lithium battery, you have to confirm whether it can withstand 6V.
So how to select parameters according to the project? For example, if you want to make a quadruped robot, and each leg needs to support the body weight, then you have to choose one with a torque of more than 2.5kg/cm; if you are making a camera gimbal, the focus is not on strength but on speed and accuracy. It is best to choose one with a speed of less than 0.12 seconds/60 degrees and an accuracy of 1 degree. The model name of micro servo usually contains this information. For example, "MA" in it means metal gear, and the torque will be larger. If you list the project requirements and check them one by one against the parameter table, you will basically not make the wrong choice.
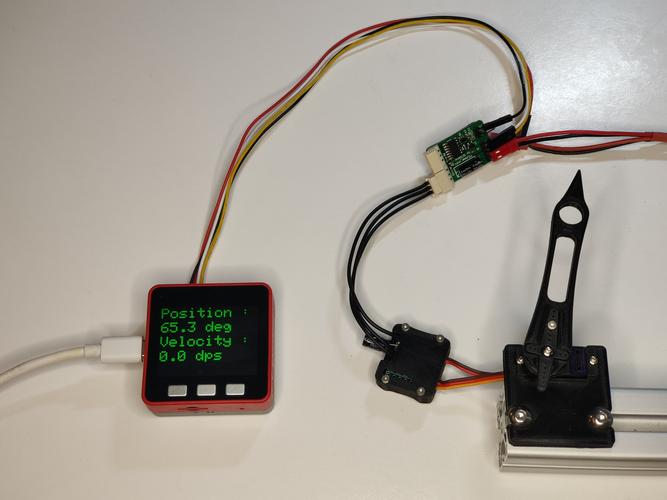
Small robot joints are its most classic use. Whether it is a bionic six-legged robot or a bipedal humanoid robot, this 9- to 20-gram servo can provide just enough torque without making the whole machine overweight. The six-legged robot I built uses 12 micro servo, with three joints in each leg. It walks smoothly, and the temperature of the servo is only warm after running for half an hour, indicating that the heat dissipation and efficiency are good. It is also its home field for rudder control of model aircraft and car models, and its size can just fit into the wing or frame.
From the perspective of product innovation, the advantages of this steering gear are small size, light weight and low power consumption. You can use it to make many imaginative things, such as automatic feeders - using a servo to control the flipping lid of the food bowl; smart switches - using a servo to physically press the old-fashioned switch; and small robotic arms for desktop automation. Recently, a maker made an automatic tracking camera, which is a two-axis gimbal built with a micro servo and equipped with visual recognition. The finished product is more than half cheaper than what is available on the market. It can come in handy for any scene that requires precise movement at a small angle.
Before installation, prepare all the tools: screwdriver of corresponding size (generally Phillips PH0 or PH00), mounting bracket (usually included in the servo package), and M2 or M2.5 screws. ️The first step is to confirm the installation direction. There is an arrow on the servo housing to mark the direction of rotation. Do not install it backwards. ️Second step, use screws to fix the servo to the bracket. Be careful not to tighten the screws too tightly. If you feel the force is strong, just turn it half a turn. If the plastic shell is cracked, it will be troublesome. ️The third step is to choose the appropriate rudder arm and cut off the excess holes according to your connecting rod structure.
There are several details to pay attention to during installation. Before installing the rudder arm, first energize the rudder to return it to the neutral position (usually a pulse signal of 1500 microseconds), and then install the rudder arm. This can ensure that the left and right rotation angles are symmetrical. In addition, if you are using the metal gear version, the gear position must be aligned with the flat surface on the output shaft during installation, otherwise it will not be installed in the end. In terms of wiring, the three wires are power supply (red), ground wire (brown or black), and signal wire (orange or yellow). Be careful not to connect them reversely, otherwise the control board will be easily burned. These details may seem trivial, but they can prevent you from struggling for a long time and discovering that you are pretending to be "disabled".
Controlling the servo is actually not that mysterious. It listens to the PWM signal, which is a square wave with changing duty cycle. Simply put, the signal period is 20 milliseconds, and the high level time is between 0.5 and 2.5 milliseconds, corresponding to 0 to 180 degrees. If you use control, the code is extremely simple. First#
If you want to do more complex actions, such as coordinated movement of multiple servos or smoother movements, you can try using timer interrupts to precisely control the position of each servo. For example, when doing robotic arm grabbing, you can continuously send angles to several servos in a loop, and then coordinate with delay or control time. If you use a Raspberry Pi, there are corresponding libraries, such as the PWM function in RPi.GPIO. If you want to achieve smooth movements like robot dancing, you can also introduce an interpolation algorithm to let the servo move in sections between two angles, so that the movement does not look like a "zombie jump".
Let's settle the score. Off-brand servos are indeed cheap, costing only a dozen or twenty yuan each, but their lifespan may only be a few hundred operations. After the gears wear out, they will start to vibrate or even lose control. If something goes wrong in an important project, you may lose the entire prototype or the opportunity to compete. The price of a micro servo is generally between 40 and 80 yuan, but the metal gear version can be used for tens of thousands of times without any problem. In addition, after-sales guarantee is provided, and if one breaks, it will still be covered by the warranty. From this perspective, its long-term cost is actually lower.
In addition, from the perspective of project success rate, the performance consistency of brand servos is particularly important. If you buy ten different brands, the movement speed of each one may be different, making it difficult for the robot to walk in a straight line. The batch stability of micro servo is good, and the parameter deviation is very small. Once you debug a set of codes, you can directly run it with other servos of the same model. If you are prototyping a product or participating in a robotics competition, this kind of reliability is the key to success or failure. So my suggestion is, don’t save money on core components, go to the official website to search the product line, and choosing the right model will be half the success of your project.
Have you encountered any interesting modifications or pitfalls when using micro servo? Welcome to share your experience in the comment area so that more maker friends can avoid detours. If you think this content is helpful to you, don’t forget to like it and share it with your friends who are working on robot projects.
Update Time:2026-03-24
Contact Kpower's product specialist to recommend suitable motor or gearbox for your product.


